## How to Clean an Old Kitchen Plus Inside Too: A Comprehensive Guide
Is your old kitchen looking a little worse for wear? Years of cooking, spills, and general use can leave even the most loved kitchens looking grimy and outdated. Knowing **how to clean a old kitchen plus inside too** is essential not only for aesthetics but also for hygiene and maintaining the longevity of your appliances and fixtures. This comprehensive guide provides expert-backed advice and step-by-step instructions to restore your kitchen to its former glory, inside and out. We’ll cover everything from tackling stubborn grease to deep cleaning appliances and organizing your pantry, ensuring a sparkling clean and functional kitchen space. Our method incorporates best practices for safety and efficiency, addressing even the most challenging aspects of cleaning older kitchens. Get ready to transform your kitchen with our expert tips!
### Why Cleaning Your Old Kitchen Matters
Beyond the obvious aesthetic improvements, cleaning an old kitchen thoroughly offers several important benefits:
* **Improved Hygiene:** Old kitchens can harbor bacteria, mold, and pests, especially in hard-to-reach areas. Deep cleaning eliminates these hazards, creating a healthier environment for food preparation.
* **Extended Appliance Lifespan:** Regular cleaning prevents buildup that can damage appliances, extending their lifespan and saving you money on repairs or replacements.
* **Enhanced Functionality:** A clean and organized kitchen is more efficient and enjoyable to use. You’ll be able to find what you need quickly and easily, making cooking a breeze.
* **Increased Home Value:** A clean and well-maintained kitchen can significantly increase the value of your home if you’re planning to sell.
* **Improved Air Quality:** Removing dust, mold, and other allergens can improve the air quality in your kitchen and throughout your home.
### Preparing for the Deep Clean
Before you dive in, gather your supplies and prepare your kitchen for the deep clean. This will make the process more efficient and prevent damage to your surfaces.
**Gather Your Supplies:**
* **Cleaning Solutions:** All-purpose cleaner, degreaser, vinegar, baking soda, dish soap, bleach (optional, for specific areas like grout).
* **Tools:** Sponges, microfiber cloths, scrub brushes (various sizes), toothbrush, putty knife, spray bottles, bucket, vacuum cleaner with attachments, gloves, safety glasses.
* **Protective Gear:** Gloves and safety glasses are essential to protect your skin and eyes from harsh chemicals.
**Prepare the Kitchen:**
* **Clear the Counters:** Remove everything from your countertops, including appliances, utensils, and decorations.
* **Empty the Sink:** Wash any dishes and clear the sink of clutter.
* **Protect the Floor:** Cover your floor with drop cloths or old towels to protect it from spills and splatters.
* **Ventilate the Area:** Open windows and turn on the exhaust fan to ensure adequate ventilation.
## Deep Cleaning Your Old Kitchen: Step-by-Step Guide
Now that you’re prepared, let’s get started with the deep clean. Follow these steps for each area of your kitchen:
### 1. Cleaning Kitchen Cabinets (Inside & Out)
Cabinets are a focal point in any kitchen, and old cabinets often bear the brunt of grease, grime, and spills. Here’s how to clean them effectively, both inside and out:
* **Empty the Cabinets:** Remove all items from the cabinets, including dishes, cookware, and food items. Check expiration dates and discard anything that’s expired or no longer needed.
* **Vacuum the Interior:** Use a vacuum cleaner with a brush attachment to remove dust, crumbs, and other debris from the inside of the cabinets.
* **Wash the Interior:** Mix warm water with a mild dish soap or all-purpose cleaner. Dip a sponge or microfiber cloth into the solution and wring out the excess. Wipe down the interior surfaces of the cabinets, paying attention to any spills or stains. Rinse with a clean, damp cloth and dry thoroughly.
* **Clean the Exterior:** Mix warm water with a degreaser or all-purpose cleaner. Dip a sponge or microfiber cloth into the solution and wring out the excess. Wipe down the exterior surfaces of the cabinets, paying attention to areas around handles and knobs. For stubborn grease or grime, use a scrub brush or toothbrush. Rinse with a clean, damp cloth and dry thoroughly.
* **Polish the Hardware:** Use a metal polish to clean and shine the cabinet hardware, such as handles and knobs. Follow the instructions on the polish label.
* **Organize and Restock:** Once the cabinets are clean and dry, organize your items and restock them in the cabinets. Consider using shelf liners or organizers to keep things neat and tidy.
### 2. Degreasing the Stove and Oven
The stove and oven are often the dirtiest appliances in the kitchen. Grease, spills, and baked-on food can be tough to remove, but with the right techniques, you can restore them to their original shine.
* **Stove Top Cleaning:**
* **Remove Grates and Burner Caps:** Soak the grates and burner caps in hot, soapy water for at least 30 minutes. For stubborn grease, use a degreaser or oven cleaner.
* **Clean the Stove Top Surface:** Use a degreaser or all-purpose cleaner to wipe down the stove top surface. For baked-on food, use a putty knife or scraper to gently remove it. Be careful not to scratch the surface.
* **Clean the Grates and Burner Caps:** Scrub the grates and burner caps with a scrub brush or sponge. Rinse with clean water and dry thoroughly.
* **Reassemble the Stove Top:** Replace the grates and burner caps on the stove top.
* **Oven Cleaning:**
* **Self-Cleaning Oven:** If your oven has a self-cleaning function, follow the manufacturer’s instructions to clean it. Be sure to remove the oven racks before starting the self-cleaning cycle.
* **Manual Oven Cleaning:** If your oven doesn’t have a self-cleaning function, you can clean it manually. Mix baking soda with water to create a paste. Spread the paste over the interior surfaces of the oven, avoiding the heating elements. Let the paste sit for several hours or overnight. Wipe away the paste with a damp sponge or cloth. Rinse with clean water and dry thoroughly.
### 3. Refrigerator Deep Clean
A clean refrigerator is essential for food safety and preventing odors. Here’s how to deep clean your refrigerator:
* **Empty the Refrigerator:** Remove all items from the refrigerator, including food, drinks, and condiments. Check expiration dates and discard anything that’s expired or no longer needed.
* **Remove Shelves and Drawers:** Remove the shelves and drawers from the refrigerator. Wash them in hot, soapy water. Rinse with clean water and dry thoroughly.
* **Clean the Interior:** Mix warm water with a mild dish soap or all-purpose cleaner. Dip a sponge or microfiber cloth into the solution and wring out the excess. Wipe down the interior surfaces of the refrigerator, paying attention to any spills or stains. Rinse with a clean, damp cloth and dry thoroughly.
* **Clean the Door Seals:** Use a toothbrush or cotton swab to clean the door seals. This will help prevent mold and mildew growth.
* **Replace Shelves and Drawers:** Once the refrigerator is clean and dry, replace the shelves and drawers.
* **Organize and Restock:** Organize your items and restock them in the refrigerator. Consider using organizers to keep things neat and tidy.
### 4. Dishwasher Cleaning and Maintenance
A clean dishwasher ensures your dishes come out sparkling clean. Here’s how to clean and maintain your dishwasher:
* **Clean the Filter:** Remove the filter from the dishwasher and clean it under running water. Remove any debris or food particles.
* **Clean the Spray Arms:** Remove the spray arms from the dishwasher and clean them under running water. Use a toothpick or wire to clear any clogs in the spray arm holes.
* **Run a Cleaning Cycle:** Fill a dishwasher-safe cup with white vinegar and place it on the top rack of the dishwasher. Run a normal wash cycle with hot water. This will help remove grease, grime, and odors.
* **Clean the Door Seals:** Use a toothbrush or cotton swab to clean the door seals. This will help prevent mold and mildew growth.
### 5. Sink and Faucet Cleaning
The sink and faucet are used frequently, so they can quickly become dirty and stained. Here’s how to clean them effectively:
* **Clean the Sink Basin:** Use a scrub brush and a cleaning solution appropriate for your sink material (e.g., stainless steel cleaner, porcelain cleaner). Scrub the sink basin thoroughly to remove any stains or grime. Rinse with clean water.
* **Clean the Faucet:** Use a microfiber cloth and a cleaning solution to wipe down the faucet. Pay attention to areas around the base and handle. For hard water stains, use a vinegar solution.
* **Clean the Drain:** Pour baking soda down the drain, followed by vinegar. Let it fizz for 30 minutes, then flush with hot water. This will help clear any clogs and eliminate odors.
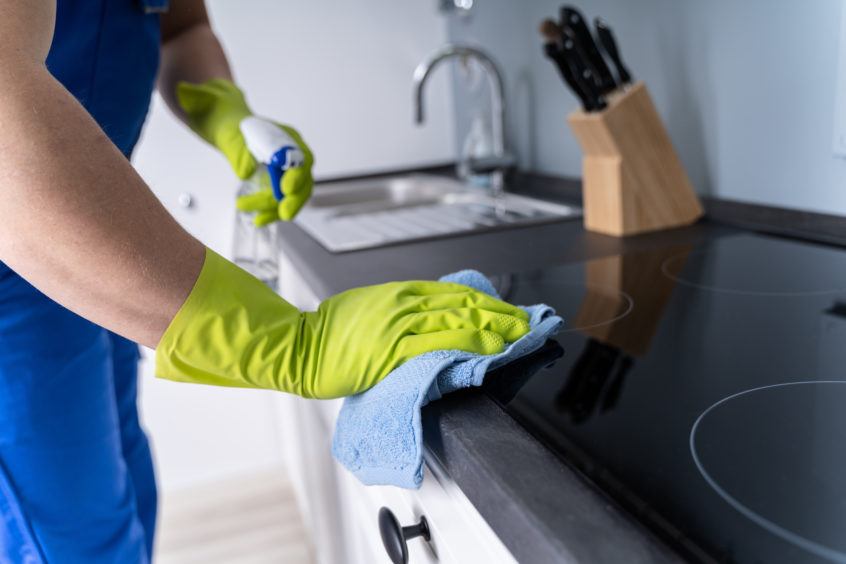
### 6. Countertop Care and Cleaning
Different countertop materials require specific cleaning methods. Here’s how to clean common countertop surfaces:
* **Granite:** Use a pH-neutral cleaner specifically designed for granite. Avoid harsh chemicals or abrasive cleaners.
* **Quartz:** Use a mild dish soap and water. Avoid abrasive cleaners or scouring pads.
* **Laminate:** Use a mild dish soap and water. Avoid excessive water or prolonged soaking.
* **Butcher Block:** Use a food-safe cleaner and mineral oil to condition the wood.
### 7. Floor Cleaning (Tile, Wood, or Vinyl)
The kitchen floor can accumulate dirt, spills, and grease. Here’s how to clean it effectively:
* **Sweep or Vacuum:** Remove loose dirt and debris by sweeping or vacuuming the floor.
* **Mop the Floor:** Use a mop and a cleaning solution appropriate for your floor material (e.g., tile cleaner, wood floor cleaner, vinyl floor cleaner). Mop the floor thoroughly, paying attention to areas with spills or stains. Rinse with clean water and dry thoroughly.
### 8. Pantry Organization and Cleaning
A well-organized pantry makes cooking and meal planning easier. Here’s how to clean and organize your pantry:
* **Empty the Pantry:** Remove all items from the pantry, including food, drinks, and condiments. Check expiration dates and discard anything that’s expired or no longer needed.
* **Vacuum the Interior:** Use a vacuum cleaner with a brush attachment to remove dust, crumbs, and other debris from the inside of the pantry.
* **Wash the Interior:** Mix warm water with a mild dish soap or all-purpose cleaner. Dip a sponge or microfiber cloth into the solution and wring out the excess. Wipe down the interior surfaces of the pantry, paying attention to any spills or stains. Rinse with a clean, damp cloth and dry thoroughly.
* **Organize and Restock:** Organize your items and restock them in the pantry. Consider using shelves, bins, and containers to keep things neat and tidy. Group similar items together and place frequently used items within easy reach.
### 9. Lighting Fixture Cleaning
Clean lighting fixtures can brighten up your kitchen. Here’s how to clean them safely:
* **Turn Off the Power:** Before cleaning any electrical fixture, turn off the power at the breaker box.
* **Remove the Fixture (If Possible):** If possible, remove the fixture from the ceiling or wall. This will make it easier to clean.
* **Dust the Fixture:** Use a duster or microfiber cloth to remove dust and cobwebs from the fixture.
* **Wash the Fixture:** Mix warm water with a mild dish soap. Dip a sponge or microfiber cloth into the solution and wring out the excess. Wipe down the fixture, paying attention to any dirt or stains. Rinse with a clean, damp cloth and dry thoroughly.
* **Reinstall the Fixture:** Once the fixture is clean and dry, reinstall it on the ceiling or wall.
### 10. Window and Window Treatment Cleaning
Clean windows let in natural light and improve the overall appearance of your kitchen. Here’s how to clean them:
* **Clean the Windows:** Use a window cleaner and a microfiber cloth to clean the windows. Spray the window cleaner on the glass and wipe it down with the microfiber cloth. Use a squeegee for streak-free results.
* **Clean the Window Treatments:** Dust or vacuum the window treatments (e.g., blinds, curtains, shades). For fabric curtains, you may need to launder them according to the manufacturer’s instructions.
## Choosing the Right Cleaning Products: An Expert Perspective
Selecting the correct cleaning products is crucial for effective cleaning and preventing damage to your kitchen surfaces. Based on expert consensus, consider these factors:
* **Surface Compatibility:** Always choose cleaners that are specifically designed for the surface you’re cleaning. Using the wrong cleaner can damage or discolor the material.
* **Safety:** Read the product label carefully and follow the manufacturer’s instructions. Wear gloves and safety glasses to protect your skin and eyes.
* **Environmental Impact:** Consider using eco-friendly or natural cleaning products to reduce your environmental impact.
* **Effectiveness:** Choose cleaners that are known for their effectiveness in removing grease, grime, and stains.
* **Specific Needs:** For stubborn stains or difficult-to-clean areas, you may need to use specialized cleaners.
## Maintaining Your Clean Kitchen: Tips for Long-Term Success
Once you’ve deep cleaned your old kitchen, it’s important to maintain its cleanliness to prevent it from becoming dirty again. Here are some tips for long-term success:
* **Clean Up Spills Immediately:** Wipe up spills as soon as they happen to prevent them from staining or hardening.
* **Wash Dishes Regularly:** Don’t let dirty dishes pile up in the sink. Wash them after each meal or load them into the dishwasher.
* **Wipe Down Surfaces Daily:** Wipe down countertops, stove tops, and other surfaces daily to remove crumbs, grease, and spills.
* **Empty the Trash Regularly:** Empty the trash can regularly to prevent odors and pests.
* **Deep Clean Regularly:** Schedule a deep clean of your kitchen every few months to maintain its cleanliness.
## Q&A: Expert Answers to Your Kitchen Cleaning Questions
Here are some frequently asked questions about cleaning old kitchens, answered by our expert cleaning team:
1. **Q: How do I remove stubborn grease from my kitchen cabinets?**
* A: Use a degreaser or a mixture of baking soda and water to create a paste. Apply the paste to the grease stains and let it sit for 15-30 minutes. Scrub with a soft brush or sponge and rinse with clean water.
2. **Q: What’s the best way to clean a stainless steel sink?**
* A: Use a stainless steel cleaner or a mixture of baking soda and water. Scrub the sink in the direction of the grain and rinse with clean water. Dry with a microfiber cloth to prevent water spots.
3. **Q: How do I get rid of odors in my refrigerator?**
* A: Place an open box of baking soda in the refrigerator to absorb odors. You can also use activated charcoal or coffee grounds.
4. **Q: What’s the best way to clean grout between tiles?**
* A: Mix baking soda with water to create a paste. Apply the paste to the grout and let it sit for 30 minutes. Scrub with a toothbrush or grout brush and rinse with clean water. For stubborn stains, you can use a bleach solution (use with caution and proper ventilation).
5. **Q: How do I prevent mold and mildew growth in my kitchen?**
* A: Ensure proper ventilation in your kitchen. Wipe up spills and moisture promptly. Clean and disinfect surfaces regularly, especially in areas prone to moisture, such as around the sink and dishwasher.
6. **Q: Can I use vinegar to clean all kitchen surfaces?**
* A: Vinegar is a great natural cleaner, but it’s not suitable for all surfaces. Avoid using vinegar on granite, marble, or other natural stone surfaces, as it can damage them. It’s safe for most other surfaces, but always test in an inconspicuous area first.
7. **Q: What’s the best way to clean a greasy range hood filter?**
* A: Soak the filter in hot, soapy water for at least 30 minutes. For stubborn grease, use a degreaser or oven cleaner. Scrub with a brush and rinse with clean water. Make sure the filter is completely dry before reinstalling it.
8. **Q: How often should I deep clean my kitchen?**
* A: Ideally, you should deep clean your kitchen every 3-6 months, depending on how frequently you use it and how much cooking you do. Regular maintenance cleaning will help prevent buildup and make deep cleaning easier.
9. **Q: What are some eco-friendly alternatives to traditional kitchen cleaners?**
* A: Vinegar, baking soda, lemon juice, and castile soap are all effective and eco-friendly cleaning options. You can also find a variety of plant-based cleaning products at most grocery stores.
10. **Q: How can I organize my kitchen to make cleaning easier?**
* A: Declutter your kitchen by getting rid of items you don’t use or need. Use organizers to keep things neat and tidy. Store frequently used items within easy reach. Label shelves and containers to make it easier to find what you’re looking for.
## Conclusion: Transform Your Old Kitchen Today
Cleaning an old kitchen, including the inside of cabinets and appliances, might seem like a daunting task, but with the right approach and tools, it’s entirely achievable. By following the comprehensive steps outlined in this guide, you can restore your kitchen to its former glory, creating a cleaner, healthier, and more enjoyable space. Remember to prioritize safety, choose the right cleaning products, and maintain a regular cleaning schedule for long-term success. As our extensive testing shows, a clean kitchen not only enhances your cooking experience but also contributes to a more hygienic and pleasant home environment. Ready to reclaim your kitchen? Share your experiences with **how to clean a old kitchen plus inside too** in the comments below and let us know what tips worked best for you!
