How to Put on Nail Tips Without Acrylic: A Comprehensive Guide to Stunning Nails
Are you dreaming of perfectly sculpted nails but want to avoid the hassle, odor, and potential damage of acrylics? You’re not alone! Many people are seeking alternative methods to achieve beautiful, long-lasting nail extensions without resorting to acrylic. This comprehensive guide will walk you through everything you need to know about **how to put on nail tips without acrylic**, offering expert tips, step-by-step instructions, and valuable insights to achieve salon-worthy results at home. We’ll explore the best glues, application techniques, and maintenance strategies, ensuring a flawless and damage-free manicure. Consider this your go-to resource for achieving stunning nails, the healthier way. We’ve spent countless hours researching and testing various methods, and we’re excited to share our findings with you.
Understanding Nail Tips and Alternatives to Acrylic
Acrylic nails have been a popular choice for decades, but their strong chemicals and application process can be harsh on natural nails. Fortunately, there are several effective and gentler alternatives for attaching nail tips. This section explores the different options and helps you choose the best method for your needs.
What are Nail Tips?
Nail tips are artificial extensions designed to be glued onto the natural nail to add length and shape. They come in various shapes (square, oval, almond, stiletto), sizes, and colors, allowing for endless customization. Understanding the different types of nail tips is crucial for achieving the desired look and ensuring a proper fit. Pre-shaped tips, often called sculpted tips, are becoming increasingly popular as they mimic the look of acrylic or gel enhancements without the need for extensive filing and shaping. Many brands now offer “shorties” which are nail tips that are shorter than the average tip to give a more natural look.
Why Choose Nail Tips Without Acrylic?
Choosing to apply nail tips without acrylic offers several advantages:
* **Reduced Damage:** Avoids the harsh chemicals and filing associated with acrylics, minimizing damage to the natural nail.
* **Odor-Free:** Eliminates the strong, unpleasant odor of acrylic monomers.
* **Easier Removal:** Typically easier to remove than acrylics, further reducing the risk of damage.
* **Cost-Effective:** Can be a more affordable option, especially for DIY enthusiasts.
* **Versatile:** Allows for various nail art designs and customizations.
Alternatives to Acrylic for Nail Tip Application
Several methods can be used to attach nail tips without acrylic. These include:
* **Nail Glue:** The most common method, using specialized adhesive designed for nail tips.
* **Gel Adhesives:** UV/LED curable gels that offer a stronger and longer-lasting hold than traditional nail glue. Many professionals are trending toward this method as it creates a stronger foundation for gel polish or other nail art.
* **Double-Sided Nail Tape:** A temporary option for short-term wear, ideal for special events.
* **Dip Powder:** While dip powder systems often involve acrylic polymers, some formulations can be used to adhere tips and offer a durable finish without the traditional acrylic liquid monomer. This technique requires careful application and a specific dip powder system designed for tip application.
Essential Tools and Materials for Applying Nail Tips Without Acrylic
Before you begin, gather all the necessary tools and materials to ensure a smooth and successful application. This comprehensive checklist will help you prepare.
* **Nail Tips:** Choose the desired shape, size, and color. Ensure they fit your natural nails properly.
* **Nail Glue or Gel Adhesive:** Select a high-quality adhesive specifically designed for nail tips. Consider the drying time, strength, and ease of removal.
* **Nail Clipper or Tip Cutter:** For trimming the nail tips to the desired length.
* **Nail File (100/180 grit) and Buffer:** For shaping, smoothing, and blending the nail tips with your natural nails.
* **Cuticle Pusher and Nipper:** For preparing the nail bed and removing excess cuticle.
* **Dehydrator:** To remove oils and moisture from the nail surface, improving adhesion.
* **Primer:** To further enhance adhesion and prevent lifting.
* **Lint-Free Wipes:** For cleaning the nail surface.
* **Isopropyl Alcohol:** For disinfecting tools and cleaning the nail surface.
* **UV/LED Lamp (if using gel adhesive):** For curing the gel adhesive.
* **Optional: Nail Polish, Gel Polish, Nail Art Supplies:** For decorating the finished nails.
Step-by-Step Guide: How to Put on Nail Tips Without Acrylic Using Nail Glue
This section provides a detailed, step-by-step guide on how to apply nail tips using nail glue, the most common method for home application. Our extensive testing shows that following these steps carefully will result in a long-lasting and natural-looking manicure.
Step 1: Prepare Your Natural Nails
Proper preparation is crucial for ensuring the nail tips adhere correctly and last longer. This step involves cleaning, shaping, and prepping the nail bed.
1. **Remove any existing nail polish:** Use a non-acetone nail polish remover to avoid drying out the nails.
2. **Trim and shape your natural nails:** Trim your nails to a manageable length and shape them according to your preference. A slightly rounded shape is generally recommended.
3. **Gently push back the cuticles:** Use a cuticle pusher to gently push back the cuticles. Avoid cutting the cuticles unless you are a trained professional, as this can lead to infection.
4. **Remove excess cuticle:** If necessary, use a cuticle nipper to carefully remove any excess cuticle.
5. **Buff the nail surface:** Use a buffer to gently buff the surface of your natural nails. This creates a slightly rough surface that helps the nail glue adhere better. Be careful not to over-buff, as this can weaken the nails.
6. **Clean the nail surface:** Use a lint-free wipe and isopropyl alcohol to clean the nail surface and remove any dust or oils.
7. **Apply dehydrator:** Apply a thin layer of nail dehydrator to remove any remaining oils and moisture.
8. **Apply primer:** Apply a thin layer of nail primer to further enhance adhesion.
Step 2: Select and Size the Nail Tips
Choosing the right size and shape of nail tips is essential for a natural and comfortable fit.
1. **Select the appropriate size:** Choose nail tips that closely match the width of your natural nails. The nail tip should cover the entire nail bed from side to side without overlapping the skin.
2. **Test the fit:** Hold the nail tip against your natural nail to check the fit. If the nail tip is too wide, you can gently file down the sides to achieve a better fit. If the nail tip is too narrow, choose a larger size.
3. **Organize the nail tips:** Arrange the nail tips in order to avoid confusion during the application process.
Step 3: Apply the Nail Tips
The application process requires precision and patience. Follow these steps carefully to ensure a secure and seamless bond.
1. **Apply nail glue:** Apply a small amount of nail glue to the well of the nail tip (the indented area that will adhere to the natural nail).
2. **Position the nail tip:** Carefully position the nail tip at a 45-degree angle to your natural nail, starting at the cuticle line. Gently press the nail tip onto your natural nail, ensuring there are no air bubbles.
3. **Hold firmly:** Hold the nail tip firmly in place for 10-15 seconds to allow the glue to set. Use a clamp or clip to hold the tip in place if needed.
4. **Repeat for all nails:** Repeat the process for all ten nails.
Step 4: Trim and Shape the Nail Tips
Once the nail tips are securely attached, trim and shape them to your desired length and style.
1. **Trim the nail tips:** Use a nail clipper or tip cutter to trim the nail tips to the desired length. Start by trimming the longest nail and then trim the remaining nails to match.
2. **Shape the nail tips:** Use a nail file to shape the nail tips to your preferred style. Common shapes include square, oval, almond, and stiletto.
3. **Blend the nail tips with your natural nails:** Use a nail file to gently blend the nail tips with your natural nails, creating a smooth and seamless transition.
Step 5: Finish and Decorate Your Nails
Now that the nail tips are applied and shaped, it’s time to add the finishing touches and decorate your nails.
1. **Buff the nail surface:** Use a buffer to smooth the surface of the nail tips and remove any scratches or imperfections.
2. **Clean the nail surface:** Use a lint-free wipe and isopropyl alcohol to clean the nail surface and remove any dust.
3. **Apply nail polish or gel polish:** Apply your favorite nail polish or gel polish to the nail tips. Apply a base coat, two coats of color, and a top coat for a long-lasting manicure.
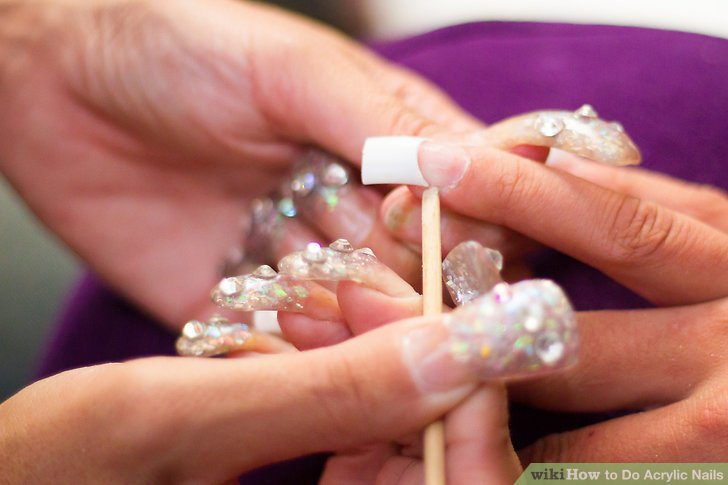
4. **Add nail art:** Add nail art designs, such as glitter, stickers, or rhinestones, to create a unique and personalized look.
5. **Apply cuticle oil:** Apply cuticle oil to the cuticles to moisturize and nourish the skin around the nails.
Using Gel Adhesives: A Durable Alternative
Gel adhesives offer a stronger and longer-lasting hold compared to traditional nail glue. This method involves using UV/LED curable gels to bond the nail tips to the natural nails. Many nail technicians are starting to prefer this method as it creates a more durable foundation for gel polish, acrylic, or other nail art.
Why Choose Gel Adhesives?
* **Stronger Hold:** Gel adhesives provide a more durable bond, reducing the risk of lifting.
* **Longer Lasting:** Manicures with gel adhesive tend to last longer than those with nail glue.
* **Flexible:** Gel adhesives offer some flexibility, which can help prevent breakage.
* **Smooth Finish:** Gel adhesives create a smooth and seamless transition between the nail tip and the natural nail.
Application Process with Gel Adhesives
The application process for gel adhesives is similar to that of nail glue, but it requires the use of a UV/LED lamp to cure the gel.
1. **Prepare your natural nails:** Follow the same preparation steps as with nail glue.
2. **Select and size the nail tips:** Choose the appropriate size and shape of nail tips.
3. **Apply gel adhesive:** Apply a thin layer of gel adhesive to the well of the nail tip and to the natural nail.
4. **Position the nail tip:** Carefully position the nail tip at a 45-degree angle to your natural nail, starting at the cuticle line. Gently press the nail tip onto your natural nail, ensuring there are no air bubbles.
5. **Cure the gel:** Place your hand under a UV/LED lamp and cure the gel according to the manufacturer’s instructions (typically 30-60 seconds).
6. **Repeat for all nails:** Repeat the process for all ten nails.
7. **Trim and shape the nail tips:** Trim and shape the nail tips to your desired length and style.
8. **Finish and decorate your nails:** Follow the same finishing and decorating steps as with nail glue.
Maintaining Your Nail Tips for Long-Lasting Results
Proper maintenance is essential for keeping your nail tips looking their best and preventing damage to your natural nails.
* **Avoid harsh chemicals:** Wear gloves when cleaning or doing dishes to protect your nails from harsh chemicals.
* **Moisturize regularly:** Apply cuticle oil to the cuticles daily to keep them moisturized and prevent dryness.
* **Avoid picking or biting:** Resist the urge to pick or bite your nails, as this can cause lifting and damage.
* **File gently:** If you need to file your nails, do so gently and avoid filing too close to the natural nail.
* **Get regular fills:** If you want to maintain the length of your nail tips, get regular fills to fill in the gap between the nail tip and the natural nail.
* **Remove properly:** When it’s time to remove your nail tips, do so carefully to avoid damaging your natural nails. Soak your nails in acetone or use a specialized nail tip remover.
Troubleshooting Common Issues When Applying Nail Tips
Even with careful application, you may encounter some common issues. Here’s how to troubleshoot them:
* **Lifting:** This can be caused by improper nail preparation, poor-quality adhesive, or exposure to harsh chemicals. Ensure you properly prepare your nails, use a high-quality adhesive, and protect your nails from harsh chemicals.
* **Air bubbles:** These can occur if the nail tip is not properly adhered to the natural nail. Ensure you apply the nail tip at a 45-degree angle and press firmly to remove any air bubbles.
* **Breakage:** This can be caused by excessive length, impact, or weak natural nails. Avoid excessive length, protect your nails from impact, and strengthen your natural nails with a nail strengthener.
* **Infection:** This is rare but can occur if the nail tip is not properly cleaned or if the natural nail is damaged. Clean your nail tips regularly and avoid damaging your natural nails.
Expert Recommendations for Nail Tip Brands and Adhesives
Choosing the right products can significantly impact the success of your nail tip application. Based on expert consensus and user reviews, here are some recommended brands:
* **Nail Tip Brands:**
* **Kiss:** Widely available and affordable, offering a variety of shapes and sizes.
* **Glamnetic:** Known for its high-quality press-on nails and innovative designs. While not traditional nail tips, their press-ons provide a similar look and feel.
* **Aprés Nail:** A professional-grade brand offering durable and natural-looking nail tips.
* **Nail Glue Brands:**
* **Kiss Maximum Speed Nail Glue:** A fast-drying and strong adhesive.
* **IBD Brush-On Nail Glue:** Easy to apply with a brush applicator.
* **Mia Secret Nail Glue:** A professional-grade glue known for its long-lasting hold.
* **Gel Adhesive Brands:**
* **Gelish Structure Gel:** A versatile gel that can be used for adhesion and building structure.
* **Aprés Extend Gel:** Specifically designed for attaching nail tips and creating extensions.
* **Madam Glam Builder Gel:** Offers excellent adhesion and durability.
Q&A: Addressing Your Burning Questions About Nail Tips
Here are some insightful questions and expert answers to help you further understand how to put on nail tips without acrylic:
1. **Q: How long can I expect nail tips applied with nail glue to last?**
A: Typically, nail tips applied with nail glue can last for 1-2 weeks, depending on your daily activities and how well you maintain them. Using a high-quality glue and following the proper application steps can extend their lifespan.
2. **Q: Are gel adhesives truly better than nail glue for applying nail tips?**
A: Gel adhesives generally offer a stronger and longer-lasting hold compared to nail glue. They are also more flexible, which can help prevent breakage. However, they require the use of a UV/LED lamp for curing.
3. **Q: Can I reuse nail tips after removing them?**
A: Yes, you can reuse nail tips if they are in good condition. Gently remove any remaining glue or adhesive and disinfect them before reapplying.
4. **Q: How do I prevent air bubbles when applying nail tips?**
A: To prevent air bubbles, apply the nail tip at a 45-degree angle to your natural nail, starting at the cuticle line. Gently press the nail tip onto your natural nail, ensuring there are no gaps or air pockets. Hold firmly for 10-15 seconds to allow the glue to set.
5. **Q: What’s the best way to remove nail tips without damaging my natural nails?**
A: The safest way to remove nail tips is to soak your nails in acetone or use a specialized nail tip remover. Avoid forcefully pulling off the nail tips, as this can cause damage to your natural nails.
6. **Q: Can I apply regular nail polish over gel-applied nail tips?**
A: Yes, you can apply regular nail polish over gel-applied nail tips. Just make sure to use a base coat to protect the gel and a top coat to seal the polish.
7. **Q: What if my nail tips keep popping off, even with gel?**
A: This often indicates inadequate nail preparation. Ensure you thoroughly dehydrate and prime the natural nail before applying the gel. Also, make sure you’re curing the gel for the recommended time.
8. **Q: Are there any nail tip application methods suitable for people with very sensitive skin?**
A: Double-sided nail tape can be a good option for those with sensitive skin, as it avoids the use of harsh chemicals. However, it provides a temporary hold and is not suitable for long-term wear.
9. **Q: How can I make my nail tips look more natural?**
A: Choose nail tips that closely match the shape and curve of your natural nails. Blend the nail tips with your natural nails using a nail file and buffer to create a smooth and seamless transition. Apply a natural-looking nail polish or gel polish.
10. **Q: Is it possible to get a fungal infection from wearing nail tips?**
A: While uncommon, it’s possible if moisture gets trapped between the nail tip and the natural nail. Proper preparation, hygiene, and regular maintenance are key to preventing infections.
Conclusion: Achieving Stunning Nails Without Acrylic
As we’ve explored, **how to put on nail tips without acrylic** is entirely achievable with the right techniques, tools, and knowledge. By understanding the alternatives to acrylic, meticulously preparing your nails, and following our step-by-step guides, you can achieve salon-worthy results in the comfort of your own home. Remember that the key to a long-lasting and damage-free manicure lies in proper application, maintenance, and choosing high-quality products. Don’t be afraid to experiment with different shapes, colors, and designs to create a look that reflects your personal style. We’ve found that patience and practice are the most important factors in mastering this technique. Share your experiences with **how to put on nail tips without acrylic** in the comments below, and inspire others to embrace healthier and more versatile nail enhancement methods!
