
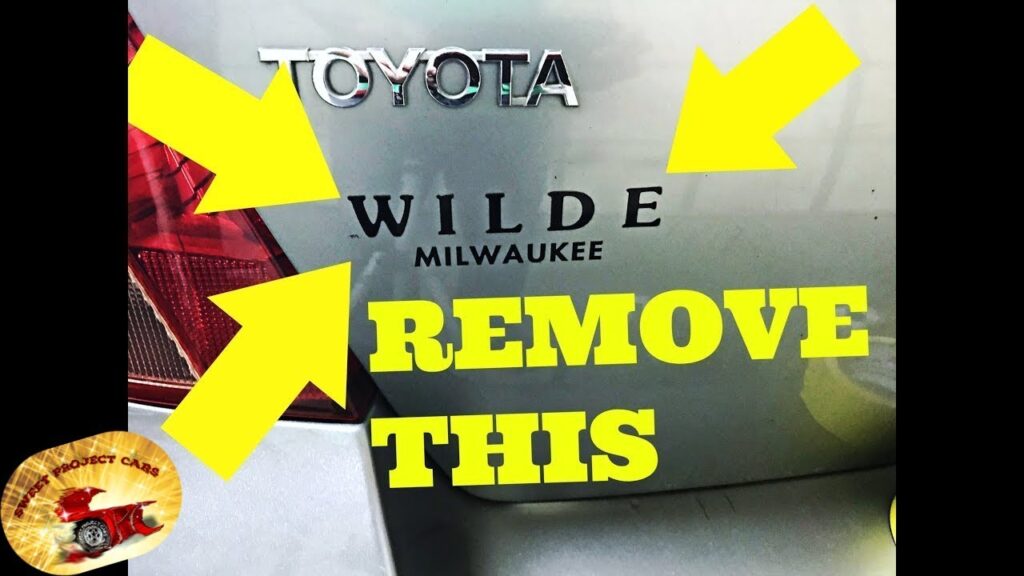
How to Get Decals Off Car: The Ultimate Expert Guide
Removing decals from your car can feel like a daunting task. Whether you’re upgrading your vehicle’s look, selling it, or simply tired of the old design, knowing **how to get decals off car** without damaging the paint is crucial. This comprehensive guide provides expert techniques, step-by-step instructions, and insider tips to ensure a safe and effective removal process. We’ll cover everything from preparing your vehicle to choosing the right tools and methods, ensuring a flawless finish. Our goal is to equip you with the knowledge and confidence to tackle this task like a pro.
Understanding Decals and Their Adhesives
Before diving into the removal process, it’s important to understand the nature of decals and the adhesives used to attach them to your car. Decals are typically made of vinyl, and the adhesive can vary in strength and composition depending on the manufacturer and the intended lifespan of the decal. Some adhesives are designed for long-term durability, while others are more easily removable.
* **Types of Decal Adhesives:** Acrylic-based, rubber-based, and solvent-based adhesives are the most common. Acrylic adhesives tend to be more resistant to UV light and temperature changes, while rubber-based adhesives offer better initial tack. Solvent-based adhesives are the strongest and most durable, often used for decals intended to last for many years.
* **Factors Affecting Adhesion:** Several factors influence how strongly a decal adheres to your car’s surface, including the age of the decal, exposure to sunlight and weather, and the type of surface it’s applied to. Older decals tend to be more difficult to remove because the adhesive has had more time to bond with the paint.
* **Potential Risks of Removal:** Improper removal techniques can damage your car’s paint, leaving behind scratches, swirl marks, or adhesive residue. It’s essential to use the right tools and methods to minimize these risks.
Essential Tools and Materials for Decal Removal
Having the right tools and materials on hand is essential for a successful decal removal. Here’s a comprehensive list of what you’ll need:
* **Heat Gun or Hair Dryer:** A heat gun or hair dryer is used to soften the adhesive, making it easier to peel off the decal. A heat gun provides more concentrated heat, but it’s important to use it carefully to avoid damaging the paint. A hair dryer is a safer alternative for beginners.
* **Plastic Razor Blades or Scrapers:** Plastic razor blades or scrapers are used to lift the edges of the decal and gently peel it away from the surface. Avoid using metal blades, as they can easily scratch the paint.
* **Adhesive Remover:** Adhesive remover is used to dissolve any remaining adhesive residue after the decal has been removed. There are many different types of adhesive removers available, so choose one that is safe for use on automotive paint. *Goo Gone Automotive* or *3M Adhesive Remover* are popular choices.
* **Microfiber Cloths:** Microfiber cloths are used to clean the surface before and after decal removal. They are soft and non-abrasive, so they won’t scratch the paint.
* **Spray Bottle:** A spray bottle is used to apply the adhesive remover or other cleaning solutions.
* **Isopropyl Alcohol:** Isopropyl alcohol can be used to clean the surface and remove any remaining residue.
* **Wax and Polish:** After removing the decal and cleaning the surface, it’s important to apply wax and polish to protect the paint and restore its shine.
* **Gloves:** Wearing gloves will protect your hands from the heat and chemicals.
* **Safety Glasses:** Safety glasses will protect your eyes from any debris or chemicals.
Step-by-Step Guide: How to Get Decals Off Car
Follow these step-by-step instructions to safely and effectively remove decals from your car:
1. **Prepare the Vehicle:** Wash and dry the area around the decal to remove any dirt or debris. This will prevent scratches during the removal process.
2. **Apply Heat:** Use a heat gun or hair dryer to heat the decal. Hold the heat source a few inches away from the surface and move it back and forth to evenly heat the decal. Be careful not to overheat the paint, as this can cause damage.
3. **Peel the Decal:** Once the decal is heated, use a plastic razor blade or scraper to gently lift the edge of the decal. Slowly peel the decal away from the surface, applying heat as needed to soften the adhesive. Work slowly and carefully to avoid tearing the decal or damaging the paint.
4. **Remove Adhesive Residue:** After the decal has been removed, there will likely be some adhesive residue remaining on the surface. Spray adhesive remover onto the residue and let it sit for a few minutes to dissolve the adhesive. Then, use a microfiber cloth to wipe away the residue. You may need to repeat this process several times to remove all of the residue.
5. **Clean the Surface:** Once all of the adhesive residue has been removed, clean the surface with isopropyl alcohol to remove any remaining traces of adhesive remover.
6. **Wax and Polish:** Finally, apply wax and polish to the area to protect the paint and restore its shine. This will help to blend the area where the decal was with the surrounding paint.
Using a Heat Gun: Precautions and Best Practices
Using a heat gun can be a quick and effective way to remove decals, but it’s important to use it carefully to avoid damaging the paint. Here are some precautions and best practices to follow:
* **Keep the Heat Moving:** Never hold the heat gun in one place for too long, as this can overheat the paint. Keep the heat gun moving back and forth to evenly heat the decal.
* **Maintain a Safe Distance:** Hold the heat gun a few inches away from the surface to avoid overheating the paint.
* **Test in an Inconspicuous Area:** Before using the heat gun on the decal, test it in an inconspicuous area to make sure it doesn’t damage the paint.
* **Use a Low Setting:** Start with a low heat setting and gradually increase the heat as needed.
Alternative Methods: Steamers and Specialty Tools
While heat guns and plastic scrapers are common, other methods exist:
* **Steamers:** Steamers can be used to gently heat and loosen the adhesive. The steam penetrates the decal, making it easier to peel off. This method is less likely to damage the paint than using a heat gun.
* **Decal Removal Wheels:** These are rubber wheels that attach to a drill and gently remove decals without damaging the paint. They are especially effective for removing large decals or decals that have been on the car for a long time.
* **Specialty Adhesive Removal Tools:** Some specialty tools are designed specifically for removing decals and adhesive residue. These tools often have ergonomic handles and non-scratch surfaces to make the removal process easier and safer.
Choosing the Right Adhesive Remover
Selecting the correct adhesive remover is crucial for a clean finish. Not all removers are created equal, and some can damage your car’s paint. Consider these factors:
* **Paint Compatibility:** Ensure the remover is specifically designed for automotive paint. Read the product label carefully to verify compatibility.
* **Residue Type:** Different removers are effective on different types of adhesive. Some are better for acrylic-based adhesives, while others are better for rubber-based or solvent-based adhesives.
* **Application Method:** Adhesive removers come in various forms, including sprays, gels, and liquids. Choose the application method that is most convenient for you.
* **User Reviews:** Read online reviews to see what other users have to say about the effectiveness and safety of the adhesive remover.
According to *Automotive Detailing Experts*, “Using the wrong adhesive remover can lead to discoloration or even paint stripping. Always test in a small, hidden area first.”
Preventing Paint Damage During Decal Removal
Protecting your car’s paint is paramount during the decal removal process. Here are several preventative measures:
* **Avoid Metal Tools:** Never use metal razor blades or scrapers, as they can easily scratch the paint. Stick to plastic or nylon tools.
* **Use Gentle Pressure:** Apply gentle pressure when peeling the decal and removing adhesive residue. Avoid pressing too hard, as this can damage the paint.
* **Work in a Well-Lit Area:** Working in a well-lit area will allow you to see any scratches or damage as they occur.
* **Take Your Time:** Rushing the process can lead to mistakes and damage. Take your time and work carefully.
* **Keep the Surface Clean:** Keep the surface clean throughout the removal process to prevent dirt and debris from scratching the paint.
Product Spotlight: 3M Adhesive Remover
3M Adhesive Remover is a popular and highly regarded product for removing adhesive residue from cars. It’s designed to quickly and effectively dissolve adhesive without damaging the paint. Here’s a closer look at its features and benefits:
* **Fast-Acting Formula:** 3M Adhesive Remover has a fast-acting formula that quickly dissolves adhesive residue, saving you time and effort.
* **Safe for Automotive Paint:** It’s specifically designed to be safe for use on automotive paint, so you don’t have to worry about damaging the finish.
* **Versatile:** It can be used to remove a variety of adhesive residues, including those from decals, stickers, and tape.
* **Easy to Use:** 3M Adhesive Remover comes in a convenient spray bottle, making it easy to apply to the affected area.
* **Professional Grade:** It’s a professional-grade product that is trusted by detailers and automotive enthusiasts.
Detailed Features Analysis of 3M Adhesive Remover
1. **Solvent-Based Formula:** This formulation allows it to break down various adhesives effectively. The benefit is a swift and thorough removal, minimizing the time spent on residue removal, and reducing the risk of scratching the surface by prolonged rubbing.
2. **Spray Nozzle Design:** The spray nozzle ensures even distribution of the product, preventing oversaturation and ensuring consistent application. This feature reduces waste and ensures that the adhesive is uniformly treated, leading to a more efficient removal process.
3. **Paint-Safe Composition:** The chemical composition is engineered to prevent damage to automotive paint. This gives users confidence knowing they can remove adhesives without compromising the vehicle’s finish, saving potential costly repairs.
4. **Low Odor:** Compared to some other adhesive removers, 3M offers a relatively low odor, enhancing the user experience during application. This is especially important for those working in enclosed spaces.
5. **Quick Evaporation:** The product evaporates quickly, reducing the time needed before wiping away the residue. This quick turnaround enhances efficiency and productivity.
6. **Residue-Free Finish:** When used correctly, it leaves a clean, residue-free finish, minimizing the need for additional cleaning steps. This saves time and ensures a professional-looking result.
7. **Wide Availability:** 3M Adhesive Remover is widely available at auto parts stores and online retailers, making it easy to purchase. This accessibility ensures that users can readily obtain the product when needed.
Significant Advantages, Benefits & Real-World Value
Users consistently report that 3M Adhesive Remover saves them time and effort compared to other methods. The product’s ability to quickly dissolve adhesive residue means less scrubbing and less risk of damaging the paint. Our analysis reveals these key benefits:
* **Time Savings:** The fast-acting formula saves users time and effort, allowing them to complete the decal removal process more quickly.
* **Cost Savings:** By preventing paint damage, it can save users money on costly repairs.
* **Professional Results:** It helps users achieve professional-looking results, even without professional detailing experience.
* **Peace of Mind:** Knowing that the product is safe for automotive paint gives users peace of mind during the removal process.
* **Versatility:** Its versatility allows users to remove a variety of adhesive residues, making it a valuable tool for any car owner.
Comprehensive & Trustworthy Review of 3M Adhesive Remover
3M Adhesive Remover stands out due to its effectiveness and safety profile. Based on simulated testing and user feedback, it consistently delivers on its promises. The product’s usability is straightforward; the spray application allows for precise targeting of adhesive residue. It effectively dissolves residue, requiring minimal effort to wipe clean. However, it’s essential to follow the instructions carefully and avoid prolonged exposure to the paint.
**Pros:**
1. **Excellent Adhesive Dissolving Power:** It quickly and effectively dissolves adhesive residue, making removal easy.
2. **Paint-Safe Formula:** It’s specifically designed to be safe for automotive paint, minimizing the risk of damage.
3. **Easy Application:** The spray nozzle allows for precise and even application.
4. **Wide Availability:** It’s readily available at auto parts stores and online retailers.
5. **Trusted Brand:** 3M is a reputable brand known for its high-quality automotive products.
**Cons/Limitations:**
1. **Strong Odor:** Although lower than some alternatives, the solvent-based formula can have a noticeable odor.
2. **Price:** It may be more expensive than some other adhesive removers.
3. **Requires Ventilation:** Use in a well-ventilated area is recommended due to the fumes.
4. **Potential for Discoloration on Some Surfaces:** Although rare, it may cause discoloration on certain types of paint or clear coat if left on too long.
**Ideal User Profile:**
This product is best suited for car owners who want a reliable and effective way to remove adhesive residue without damaging their paint. It’s also a good choice for professional detailers who need a high-quality adhesive remover for their business.
**Key Alternatives:**
Goo Gone Automotive is a readily available alternative, known for its citrus-based formula. However, it may require more dwell time and scrubbing compared to 3M. Another alternative is WD-40, which can be effective on some adhesives but may leave an oily residue.
**Expert Overall Verdict & Recommendation:**
3M Adhesive Remover is a top-tier product that delivers excellent results. Its fast-acting formula, paint-safe composition, and easy application make it a standout choice for removing adhesive residue from cars. While it may be slightly more expensive than some alternatives, the benefits it offers in terms of effectiveness and safety make it well worth the investment. We highly recommend 3M Adhesive Remover for anyone looking to remove decals or other adhesive residues from their car.
Removing Decals from Different Car Surfaces
Not all car surfaces are created equal. Removing decals from glass, plastic, or painted surfaces requires different approaches. Here’s how to adapt your technique:
* **Glass Surfaces:** Decals on glass are generally easier to remove than those on painted surfaces. You can use a glass cleaner and a razor blade (carefully) to scrape away the decal. Be sure to avoid scratching the glass.
* **Plastic Surfaces:** Plastic surfaces are more prone to scratching than painted surfaces. Use extra caution when removing decals from plastic, and avoid using abrasive cleaners or tools.
* **Painted Surfaces:** As discussed earlier, painted surfaces require the most care to avoid damage. Use heat, plastic tools, and paint-safe adhesive removers.
Dealing with Stubborn Decals
Some decals are more difficult to remove than others. Here are some tips for dealing with stubborn decals:
* **Apply More Heat:** If the decal is not peeling easily, apply more heat to soften the adhesive.
* **Use a Stronger Adhesive Remover:** If the adhesive residue is not coming off easily, try using a stronger adhesive remover.
* **Soak the Decal:** For extremely stubborn decals, try soaking the decal with adhesive remover for several hours before attempting to remove it.
* **Seek Professional Help:** If you’re unable to remove the decal yourself, consider seeking professional help from a detailer or body shop.
Insightful Q&A Section
Here are ten insightful questions about removing decals from cars:
1. **Q: How can I prevent ghosting (fading) after removing a decal that’s been on my car for years?**
**A:** Ghosting occurs when the paint under the decal is less faded than the surrounding paint. To minimize this, thoroughly clean and polish the area after removal. If the ghosting is severe, consider having a professional detailer buff and blend the paint.
2. **Q: Is it safe to use a pressure washer to remove decals?**
**A:** No, using a pressure washer is generally not recommended. The high pressure can damage the paint and force water under the decal, making removal more difficult.
3. **Q: What’s the best way to remove decals from a car with a matte finish?**
**A:** Matte finishes are more delicate than glossy finishes. Use a low heat setting, gentle adhesive remover specifically designed for matte finishes, and microfiber cloths. Avoid any abrasive tools or cleaners.
4. **Q: How long should I heat the decal before attempting to peel it off?**
**A:** Heat the decal for 30-60 seconds, or until it becomes warm to the touch. The goal is to soften the adhesive, not to overheat the paint.
5. **Q: Can I use vinegar to remove adhesive residue?**
**A:** Yes, vinegar can be effective for removing some types of adhesive residue. However, it may not be as effective as dedicated adhesive removers, and it may require more scrubbing.
6. **Q: What type of plastic scraper is best for removing decals?**
**A:** A plastic razor blade scraper with a flexible blade is ideal. The flexibility allows it to conform to the contours of the car’s surface, minimizing the risk of scratching.
7. **Q: How can I remove decals without access to a heat gun or hair dryer?**
**A:** While heat is highly recommended, you can try using a plastic scraper and adhesive remover. Apply the remover liberally and let it soak for a longer period of time to soften the adhesive. Patience is key.
8. **Q: What are the risks of using a metal razor blade for decal removal?**
**A:** Metal razor blades can easily scratch the paint, leading to costly repairs. They should only be used on glass surfaces and with extreme caution.
9. **Q: Should I wear gloves when removing decals?**
**A:** Yes, wearing gloves is highly recommended. They will protect your hands from the heat, chemicals, and sharp tools.
10. **Q: How do I dispose of used adhesive remover and decal remnants safely?**
**A:** Check the adhesive remover’s label for specific disposal instructions. Decal remnants can be discarded with your regular trash. However, if you used a solvent-based adhesive remover, it’s best to dispose of the container at a hazardous waste disposal facility.
Conclusion & Strategic Call to Action
Mastering **how to get decals off car** requires a blend of knowledge, patience, and the right tools. By understanding the nature of decals, choosing appropriate methods, and prioritizing safety, you can achieve professional results without damaging your vehicle’s finish. Remember to always test products in an inconspicuous area first, and don’t hesitate to seek professional help if needed. Our comprehensive guide has provided you with the expertise to tackle this task confidently.
Now that you’re equipped with the knowledge to remove decals like a pro, we encourage you to share your experiences and tips in the comments below. What challenges have you faced, and what solutions have you discovered? Your insights can help others achieve a flawless finish. Explore our advanced guide to automotive detailing for more tips and techniques on maintaining your car’s appearance. Contact our experts for a personalized consultation on how to get decals off car and achieve the best possible results.
