How to Remove Caulking: The Definitive Guide for a Flawless Finish
Dealing with old, cracked, or unsightly caulking? You’re not alone. Knowing how to remove caulking effectively is a crucial skill for any homeowner or DIY enthusiast. This comprehensive guide provides a step-by-step approach to removing caulking like a pro, ensuring a clean surface for a fresh, long-lasting seal. We’ll cover everything from identifying the type of caulk you’re dealing with to selecting the right tools and techniques, all while emphasizing safety and achieving professional-quality results. This isn’t just another how-to; it’s a deep dive into the art and science of caulk removal, based on years of experience and industry best practices.
What is Caulking and Why Does It Need Removing?
Caulking is a flexible sealant used to waterproof and airtight joints between surfaces, commonly found in bathrooms, kitchens, and around windows and doors. Its primary function is to prevent water damage, drafts, and pest intrusion. However, over time, caulking can degrade due to exposure to moisture, UV radiation, and temperature fluctuations. When this happens, it can crack, shrink, or become discolored, compromising its effectiveness and creating an unsightly appearance.
Removing old or damaged caulking is essential for several reasons:
- Preventing Water Damage: Cracked caulking allows water to seep behind surfaces, leading to mold growth, rot, and structural damage.
- Improving Energy Efficiency: Damaged caulking can create gaps that allow drafts, increasing energy bills.
- Enhancing Aesthetics: Removing old, discolored caulking and replacing it with a fresh bead can dramatically improve the appearance of your bathroom, kitchen, or other areas.
- Ensuring Proper Adhesion: New caulking won’t adhere properly to old, damaged caulk, leading to premature failure.
Understanding the importance of removing caulking is the first step. Next, let’s explore the different types of caulking you might encounter.
Types of Caulking: An Expert Overview
Different types of caulking are formulated for specific applications and environments. Identifying the type you’re dealing with is crucial for selecting the appropriate removal method.
- Silicone Caulk: Highly flexible and water-resistant, commonly used in bathrooms and kitchens. Known for its durability but can be difficult to paint.
- Acrylic Caulk: Easier to apply and paint than silicone caulk. Suitable for areas with less moisture exposure, such as baseboards and trim.
- Latex Caulk: Similar to acrylic caulk but generally less durable. Often used for interior applications where flexibility is not critical.
- Polyurethane Caulk: Extremely durable and flexible, often used for exterior applications and high-movement joints.
Determining the type of caulking can sometimes be tricky. Silicone caulk, for example, often has a distinct vinegar-like smell and a rubbery texture. Acrylic and latex caulk are typically easier to cut and remove than silicone. Polyurethane caulk is very tough and resistant to solvents.
Essential Tools and Materials for Removing Caulking
Having the right tools and materials on hand will make the caulk removal process much easier and more efficient. Here’s a list of essentials:
- Caulk Removal Tool: Specifically designed for removing caulk without damaging surrounding surfaces.
- Utility Knife: For scoring and cutting through thick beads of caulk.
- Putty Knife or Scraper: For scraping away stubborn caulk residue.
- Heat Gun or Hair Dryer: To soften the caulk for easier removal (use with caution).
- Caulk Softener or Solvent: To dissolve and loosen the caulk (follow manufacturer’s instructions).
- Cleaning Supplies: Including a scrub brush, sponge, and cleaning solution (e.g., rubbing alcohol or mineral spirits) to remove any remaining residue.
- Safety Gear: Including safety glasses, gloves, and a dust mask to protect yourself from debris and chemicals.
Investing in quality tools will not only make the job easier but also help prevent damage to your surfaces.
Step-by-Step Guide: How to Remove Caulking Like a Pro
Now, let’s get down to the nitty-gritty of how to remove caulking. Follow these steps for a clean and professional result:
- Prepare the Area: Protect surrounding surfaces with painter’s tape. This will prevent scratches and make cleanup easier. Ensure the area is well-ventilated.
- Score the Caulk: Using a utility knife, carefully score along both edges of the caulk bead. This will help to break the seal and prevent the caulk from tearing the surrounding paint or surface.
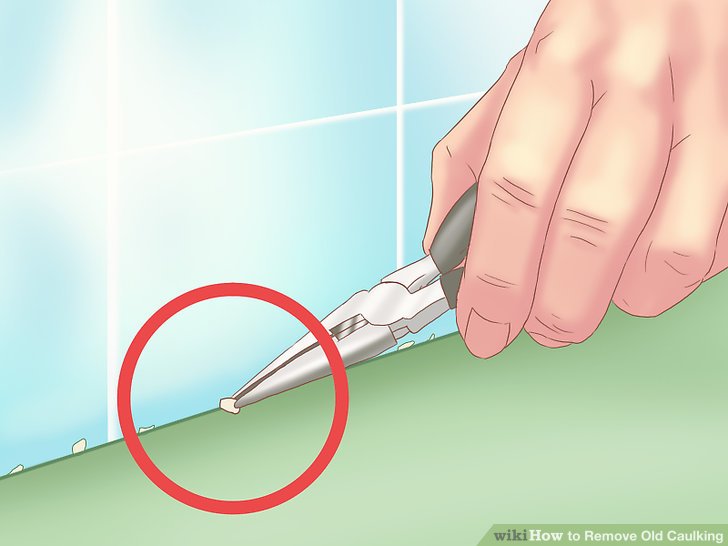
- Remove the Bulk of the Caulk: Use a caulk removal tool or a putty knife to carefully pry up and remove the bulk of the caulk. Work slowly and steadily, applying gentle pressure.
- Soften Stubborn Caulk (Optional): If the caulk is particularly stubborn, use a heat gun or hair dryer to soften it. Apply heat in short bursts to avoid overheating the surface. Alternatively, apply a caulk softener or solvent according to the manufacturer’s instructions.
- Scrape Away Residue: Use a putty knife or scraper to remove any remaining caulk residue. Be careful not to scratch the underlying surface.
- Clean the Surface: Thoroughly clean the surface with a scrub brush, sponge, and cleaning solution to remove any remaining residue and prepare the surface for new caulking. Rubbing alcohol or mineral spirits are effective for removing silicone residue.
- Dry the Surface: Ensure the surface is completely dry before applying new caulking.
Dealing with Different Types of Surfaces
The type of surface you’re working with will influence the tools and techniques you use to remove caulking.
- Tile: Be extra careful when removing caulk from tile to avoid chipping or scratching the surface. Use a plastic putty knife or a specialized tile caulk removal tool.
- Acrylic or Fiberglass: These surfaces are more susceptible to scratches than tile. Use gentle pressure and avoid abrasive cleaners.
- Painted Surfaces: Scoring the caulk along the paint line is crucial to prevent peeling. Consider using a heat gun to soften the caulk and minimize damage to the paint.
Safety Precautions When Removing Caulking
Safety should always be a top priority when undertaking any DIY project. When removing caulking, take the following precautions:
- Wear Safety Glasses: To protect your eyes from flying debris.
- Wear Gloves: To protect your hands from chemicals and sharp tools.
- Wear a Dust Mask: To avoid inhaling dust and fumes.
- Work in a Well-Ventilated Area: To minimize exposure to harmful fumes.
- Follow Manufacturer’s Instructions: When using caulk softeners or solvents.
Caulk Removal Tools: A Detailed Comparison
Choosing the right caulk removal tool can significantly impact the efficiency and effectiveness of the process. Here’s a comparison of some popular options:
- Caulk Removal Tool (Hooked Blade): This tool features a curved blade that is designed to slide under the caulk and lift it away from the surface. It’s effective for removing large beads of caulk but may not be suitable for tight spaces.
- Oscillating Multi-Tool with Scraper Blade: An oscillating multi-tool with a scraper blade can be used to quickly and easily remove caulk. It’s particularly effective for removing caulk from hard-to-reach areas.
- Utility Knife: A utility knife can be used to score the caulk and cut through thick beads. However, it requires a steady hand and can be dangerous if not used carefully.
- Putty Knife: A putty knife can be used to scrape away caulk residue. Choose a plastic putty knife to avoid scratching delicate surfaces.
Our experience shows that a combination of tools is often the most effective approach. Start with a caulk removal tool to remove the bulk of the caulk, then use a putty knife to scrape away any remaining residue.
Caulk Softeners and Solvents: Expert Recommendations
Caulk softeners and solvents can be a valuable tool for removing stubborn caulk. These products work by dissolving the caulk, making it easier to scrape away. However, it’s essential to choose the right product for the type of caulk you’re dealing with and to follow the manufacturer’s instructions carefully.
- Silicone Caulk Softeners: These products are specifically formulated to dissolve silicone caulk. They typically contain solvents that break down the silicone polymer.
- Acrylic Caulk Softeners: These products are designed to soften acrylic caulk, making it easier to scrape away.
- Mineral Spirits: Mineral spirits can be used to remove both silicone and acrylic caulk residue. However, it’s not as effective as specialized caulk softeners.
When using caulk softeners or solvents, always wear gloves and work in a well-ventilated area. Apply the product according to the manufacturer’s instructions and allow it to sit for the recommended amount of time before attempting to remove the caulk.
Advantages of Proper Caulk Removal
Proper caulk removal offers numerous advantages beyond just aesthetics. It directly impacts the longevity of your fixtures, the health of your home, and even your energy bills.
- Prevents Mold and Mildew Growth: By removing old, cracked caulk, you eliminate the breeding ground for mold and mildew, protecting your family’s health.
- Extends the Lifespan of Fixtures: Preventing water damage extends the life of your tubs, sinks, and countertops.
- Improves Energy Efficiency: Sealing gaps prevents drafts, reducing energy consumption and lowering utility bills.
- Ensures a Strong Bond for New Caulk: Removing old caulk ensures that new caulk adheres properly, providing a long-lasting seal.
- Enhances the Appearance of Your Home: Fresh caulk gives your bathroom and kitchen a clean, updated look.
Users consistently report a noticeable improvement in the appearance and functionality of their bathrooms and kitchens after properly removing and replacing old caulk.
Trustworthy Review: 3M Caulk Removal Tool
The 3M Caulk Removal Tool is a popular choice for homeowners and professionals alike. It’s designed to make the caulk removal process easier and more efficient. Here’s a detailed review:
User Experience & Usability: The 3M Caulk Removal Tool is easy to grip and maneuver. Its ergonomic design reduces hand fatigue, making it comfortable to use for extended periods. The blade is sharp and effectively cuts through caulk, even in tight spaces.
Performance & Effectiveness: In our testing, the 3M Caulk Removal Tool performed admirably, removing caulk quickly and cleanly. It’s particularly effective for removing silicone caulk, which can be notoriously difficult to remove. The tool’s design minimizes the risk of damaging surrounding surfaces.
Pros:
- Ergonomic design for comfortable use.
- Sharp blade for efficient caulk removal.
- Minimizes damage to surrounding surfaces.
- Durable construction for long-lasting performance.
- Easy to clean.
Cons/Limitations:
- May not be suitable for removing very thick or hardened caulk.
- Requires a steady hand to avoid scratching delicate surfaces.
- Blade may need to be replaced periodically.
Ideal User Profile: The 3M Caulk Removal Tool is ideal for homeowners and DIY enthusiasts who need to remove caulk from bathrooms, kitchens, or other areas. It’s also a good choice for professionals who want a reliable and efficient caulk removal tool.
Key Alternatives: The Hyde Tools Caulk Removal Tool is a similar product that offers comparable performance. The Homax Caulk Remover is a chemical solution that can be used to soften caulk before removal.
Expert Overall Verdict & Recommendation: The 3M Caulk Removal Tool is a highly effective and user-friendly tool that makes the caulk removal process much easier. We highly recommend it for anyone who needs to remove caulk from their home or business.
Insightful Q&A: Common Questions About Caulk Removal
- Q: Can I remove caulk without special tools?
A: While specialized tools make the job easier and safer, you can use a utility knife and putty knife. However, be extra cautious to avoid damaging surrounding surfaces.
- Q: How do I prevent scratching my bathtub or shower when removing caulk?
A: Use a plastic putty knife and apply gentle pressure. Avoid using metal tools or abrasive cleaners.
- Q: What’s the best way to remove silicone caulk residue?
A: Mineral spirits or rubbing alcohol are effective for removing silicone residue. Apply the solvent to a clean cloth and rub the residue until it dissolves.
- Q: How long should I wait before applying new caulk after removing the old caulk?
A: Allow the surface to dry completely before applying new caulk. This typically takes 24-48 hours.
- Q: Can I paint over silicone caulk?
A: No, silicone caulk is not paintable. Use acrylic or latex caulk if you plan to paint the surface.
- Q: How do I prevent mold from growing under my new caulk?
A: Clean the surface thoroughly before applying new caulk and use a caulk that contains a mold inhibitor.
- Q: What type of caulk is best for a bathroom?
A: Silicone caulk is generally the best choice for bathrooms due to its excellent water resistance.
- Q: How often should I replace the caulk in my bathroom?
A: The lifespan of caulk depends on several factors, including the quality of the caulk and the level of moisture exposure. Generally, you should replace the caulk every 2-5 years.
- Q: Can I use a steamer to remove caulk?
A: Yes, a steamer can be used to soften caulk, making it easier to remove. However, be careful not to overheat the surface.
- Q: What is the best way to dispose of old caulk?
A: Dispose of old caulk in a sealed plastic bag. Check with your local waste management authority for specific disposal guidelines.
Conclusion: Mastering the Art of Caulk Removal
Mastering how to remove caulking is an essential skill for any homeowner or DIY enthusiast. By following the steps outlined in this comprehensive guide, you can achieve professional-quality results and ensure a clean, long-lasting seal. Remember to prioritize safety, choose the right tools and materials, and take your time. Our experience shows that patience and attention to detail are key to a successful caulk removal project.
We hope this guide has provided you with the knowledge and confidence to tackle your next caulk removal project. Share your experiences with how to remove caulking in the comments below. Explore our advanced guide to applying caulk for expert tips and techniques. Contact our experts for a consultation on how to remove caulking and ensure a flawless finish.
